Project Details:
Import Shapefiles and KML files to populate Field Borders, Field Entrances, Pivot Centers are important features to transfer map data from a GIS enabled software. This can speed up getting started with FieldX, and can automatically set up the Grower Tree.
Import Field Borders from Shapefiles or KML Files
The process to import Shapefiles to populate Field Borders, Field Entrances, and Pivot Centers can be used to transfer map data from a GIS enabled software. This can speed up getting started with FieldX, and automatically sets up your Grower Tree.
- First, click on the Field Maps tab, then Layer Edit Tools.
- Next, click ‘Import Borders From File’.
- If you have Shapefiles, select ‘Import from Shp’, and if you have KML files, select ‘Import from KML.
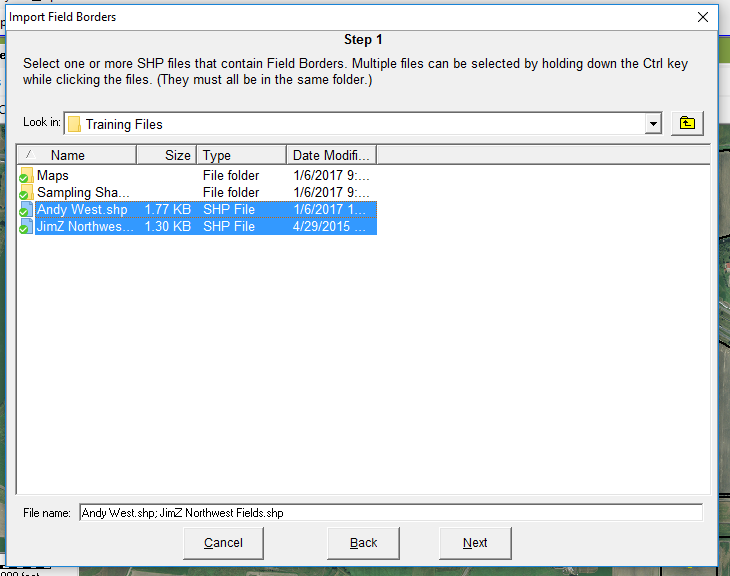
- A window opens to perform the import. Click ‘Next’ after reading the text in the first screen.
- In the next window, select the file used for the import.
- Navigate to your fields by clicking on the drop-down menu to expose your folder structure. Select multiple files by holding the control key when clicking on each file name.
- Click ‘Next’
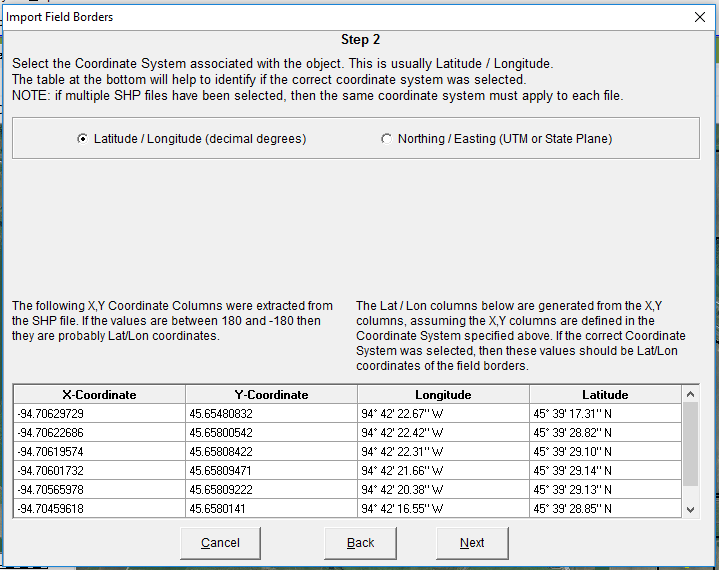
- Then select the coordinate system associated with the file, which can be either Latitude/Longitude (decimal degrees) or Northing/Easting (UTM or State Plane)
- The type of information contained in the file will impact the selection here. If the initial file was saved using Northing/Easting, the same coordinate system must be selected here.
- Click ‘Next.’
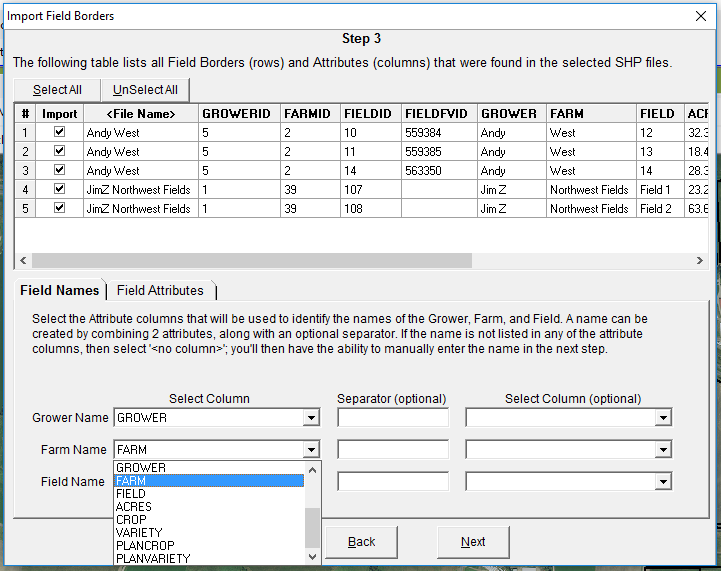
- The next screen shows the data within the shapefile, and allows the user to specify how that data will be imported.
- First, select the rows of data that should be imported by clicking on the check-box within the ‘Import’ column to select or de-select the row. Each row corresponds to a field border or point, depending on the type of data being imported.
- Next, select the column that specifies the Grower Name, Farm Name and Field Name.
- If the name is not listed, then click ‘No Column,’ and this can be specified in the next column.
- Multiple columns can be combined to name one attribute by selecting a second column on the right. Type a character for a separator in the ‘Separator’ column in the center. This might be a space, a comma, a backslash or any other character.
- Click on the Field Attributes tab to specify columns of data within the shapefile that can pre-fill the Field Attributes tab.
- Select Grower, Farm, or Field, and then select a column from the dropdown menu for any of the given attributes.
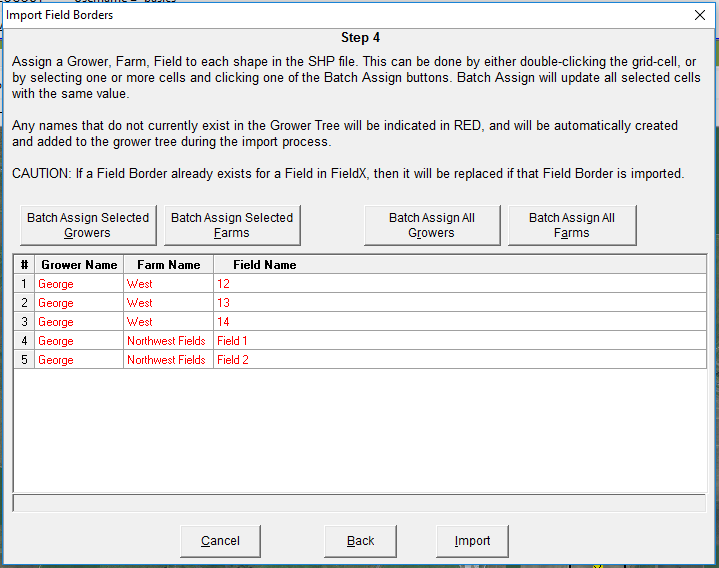
- In the final step, the Grower/Farm/Field structure that is to be imported is set and confirmed.
- Double-click on a cell to edit any of the names. This opens a window where the user can either select an existing name, or type in a new one.
- To assign the same name for a grower or field in the entire set of rows, edit one of the cells, make sure that cell is selected, then click ‘Batch Assign All Growers’ or ‘Batch Assign All Fields.’
- Any of the Grower, Farm, or Field Names in red font are new to the program will be added to the Grower Tree.
- Finally, click ‘Import’ to complete the process. The fields will be uploaded to the server.


