- Soil Sampling data created in another program can be imported into FieldX to manipulate the data or navigate to the points using our applications. This import needs to be completed in FieldX Office on the PC.
Import Sampling Entries
Soil Sampling data created in another program can be imported into FieldX to manipulate the data or navigate to the points using our applications. This import needs to be completed in FieldX Office on the PC.
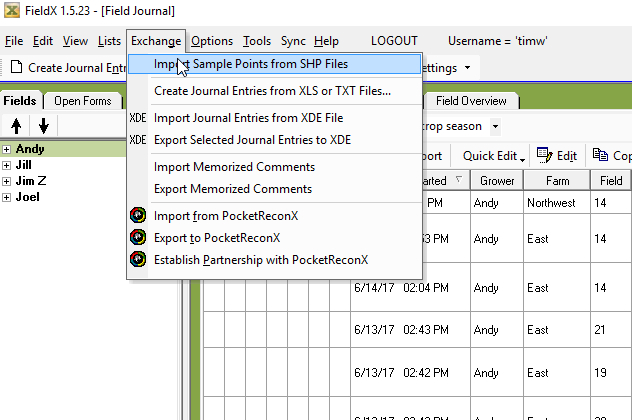
- Click on the ‘Exchange’ menu, then click ‘Import Sample Points from SHP Files. A wizard opens to import the data.
- Click ‘Next’ after reading the general information about the shpfile import capabilities.
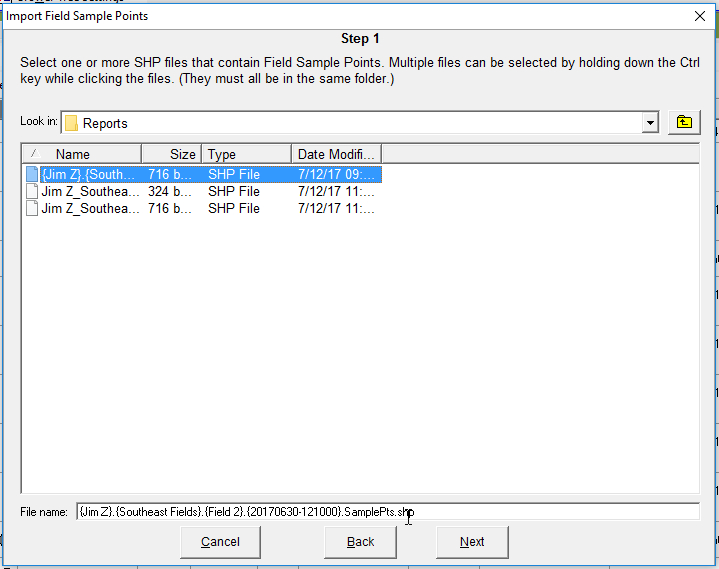
- Select the SHPfile on your computer. Note that you can select multiple SHPfiles. Click ‘Next.’
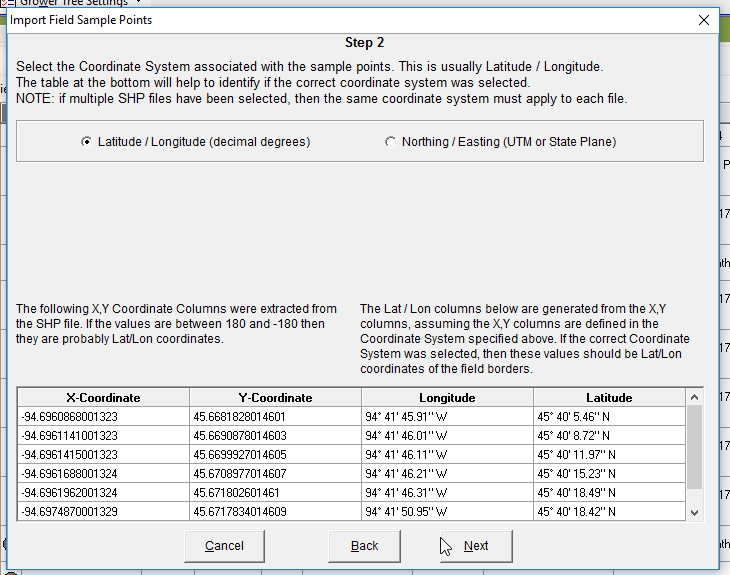
- Confirm that the points are in ‘Lat/Lon’ coordinates, or if they are in a different projection. Click on the appropriate selection, then hit ‘Next.’
- The coordinates are listed on the bottom of the screen. If the numbers displayed are between -180 and +180, the file is likely to contain Lat/Lon coordinates.
- If the coordinates are not Lat/Lon, check in the program that exported the files to identify the projection of the export. note that the right two columns should show the correct Latitute and Longitude for the points within the file.
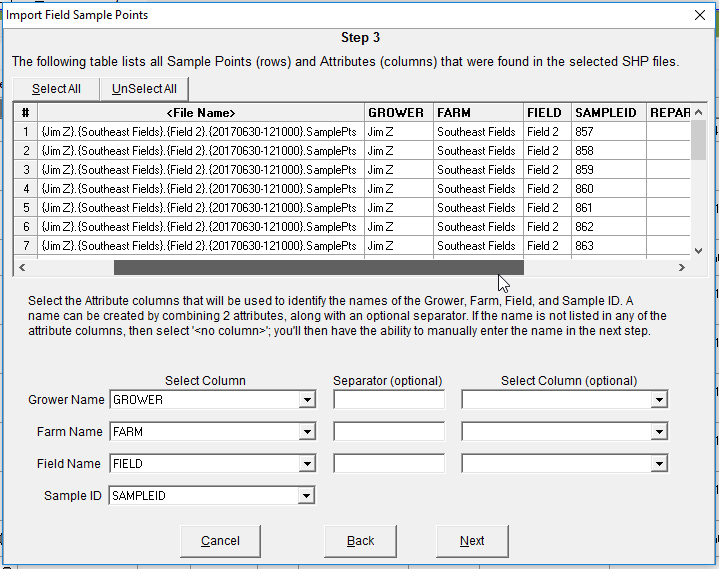
- Then match up the column names in the SHPfile to the column names in FieldX for the Grower, Farm, Field, and Sample ID. Click ‘Next.’
- If any of the columns do not match up, the data can be set up on the following page.
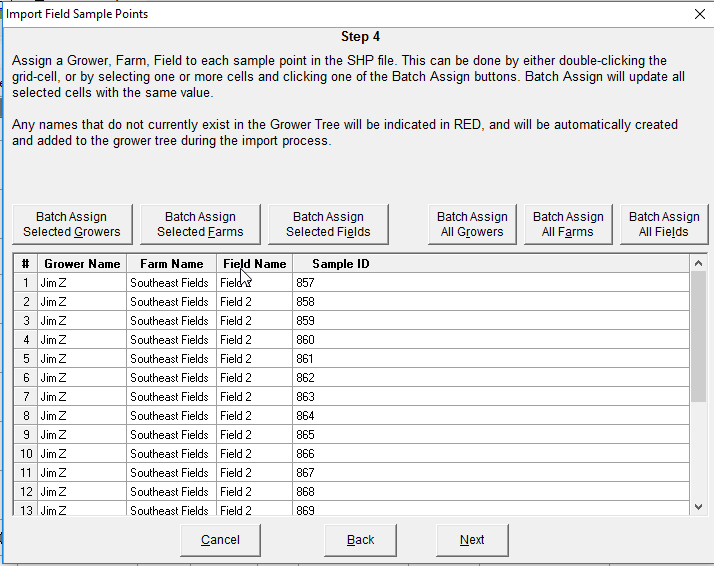
- In Step 4, confirm that the information displayed for Grower, Farm, Field and Sample ID names are correct. Click ‘Next’ when finished.
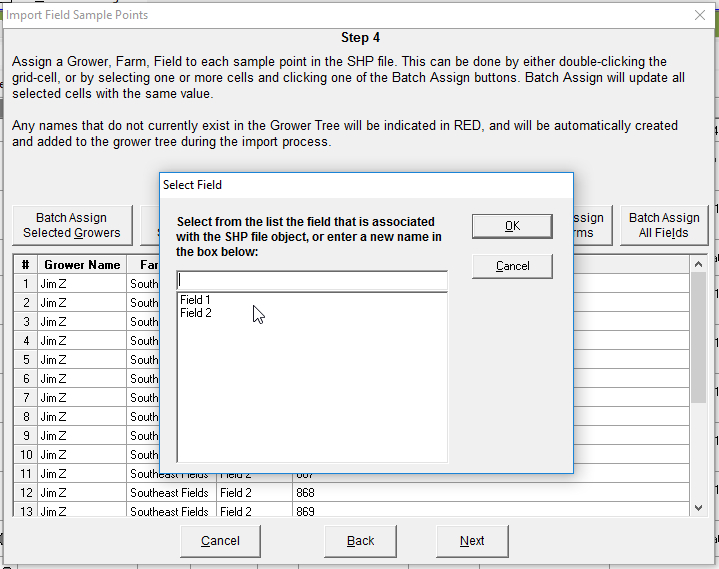
- Double-click on an individual cell to match up an existing item, or type in a new name.
- Edit multiple cells at once by clicking and dragging over the cells, or by holding the control key while clicking. Then click ‘Batch Edit Selected ….>.’
- Click ‘Batch Edit All Growers’ to match or type in a new name for all items in a particular column.
- Finally, select whether this should be saved as a Journal Entry, or as a Journal Entry Template.
- If the points need to be synced to FieldX Sampling, we recommend saving the points as a Journal Entry.
- Once the import finishes, hit the ‘Sync’ button in the top Menu to send the data to the server.


