- FieldX Journal generates PDF reports that detail recent scouting observations and Recommendations on your fields.
Create and Email Report from FieldX Journal on iPad
FieldX Journal generates output reports that detail recent scouting observations and Recommendations on your fields in a PDF format.
You can either generate output reports for a specific grower, farm, or field from the Grower Tree, or you can generate output reports across fields explicitly selected, and across multiple growers using the ‘Batch’ mode feature.
Select Fields for Report
- To generate output reports for a specific grower, farm, or field.
- In the Grower Tree, select the appropriate Grower, Farm, Field level to generate output reports.
- To generate output reports across multiple Growers using ‘Batch’ mode.
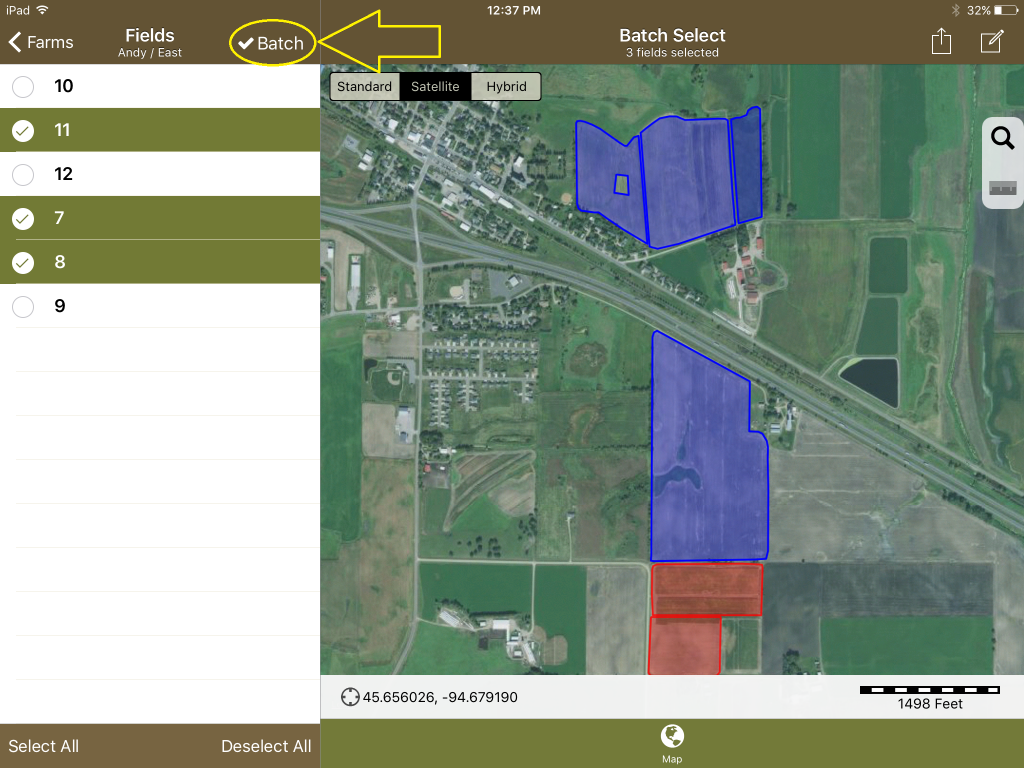
- Turn on the ‘Batch’ mode, which is above the Grower Tree on the left menu of the app.
- Once in ‘Batch’ mode you have multiple options to quickly add fields to be included in the output report.
- To quickly select all the fields for all the Growers at one time.
- With the Grower names showing in the tree, tap the ‘Select All’ option at the bottom left-corner of the tree while in ‘Batch’ mode.
- To quickly select all the fields for all the Growers at one time.
*The same process can be applied for a specific Grower or Farm.
- To select individual fields to be included in the report.
- Tap on a Grower name and select a Farm. This will list the field names and boundaries for the Farm.
- Tap on either the field name in the tree or the field boundary in the map viewer to select it. The field name will show a check-mark in the bubble to the left of the fieldname in the tree indicating it will be included in the output report
- Tap ‘Back’ to return to the Grower list and select the next grower and path down to the next Farm.
- You can quickly deselect fields at any Grower, Farm, Field level by selecting the ‘Deselect All’ option at the lower right-corner of the tree while in ‘Batch’ mode.
Generate Report
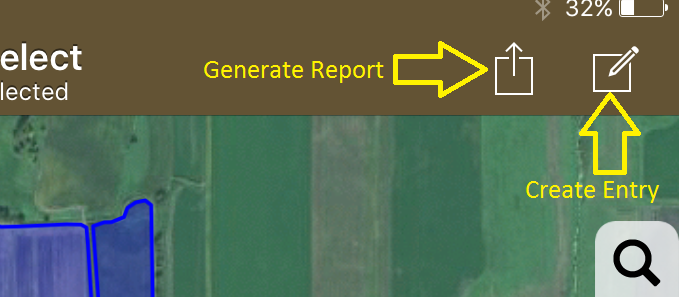
- Once you have selected the field(s) to be included in the output report. Tap the ‘Share’ icon on the top-right and select ‘Generate Output Report’ from the menu items to open the ‘Report Setup’ window.
- The ‘Report Setup’ window is where you will configure the report template for the device. In general, this only needs to be done the first time you generate a report from Journal.
-
-
- Tap on the rectangular box in the top-center of the report to add your logo.
- Type your Name, Company Name, Phone Number, and Email Address. This will be displayed on the right section of the page header.
- Change the ‘Report Time Period’ to specify how far back the app should include entries by tapping the ‘+’ or ‘-‘sign. The default setting is 3 days.
- Select ‘Recommendation’ and/or Scout/Recommendation
- The Recommendation report combines fields with identical recommendations into a single table. This report also displays the amount needed for a chemical to complete each recommendation.
- The Scout/Recommendation report shows the details of the scouting and recommendation entry on one page per field.
- Tap the ‘Create Selected Report(s)’ button at the bottom of the ‘Report Setup’ window to generate a PDF version of the output report.
-
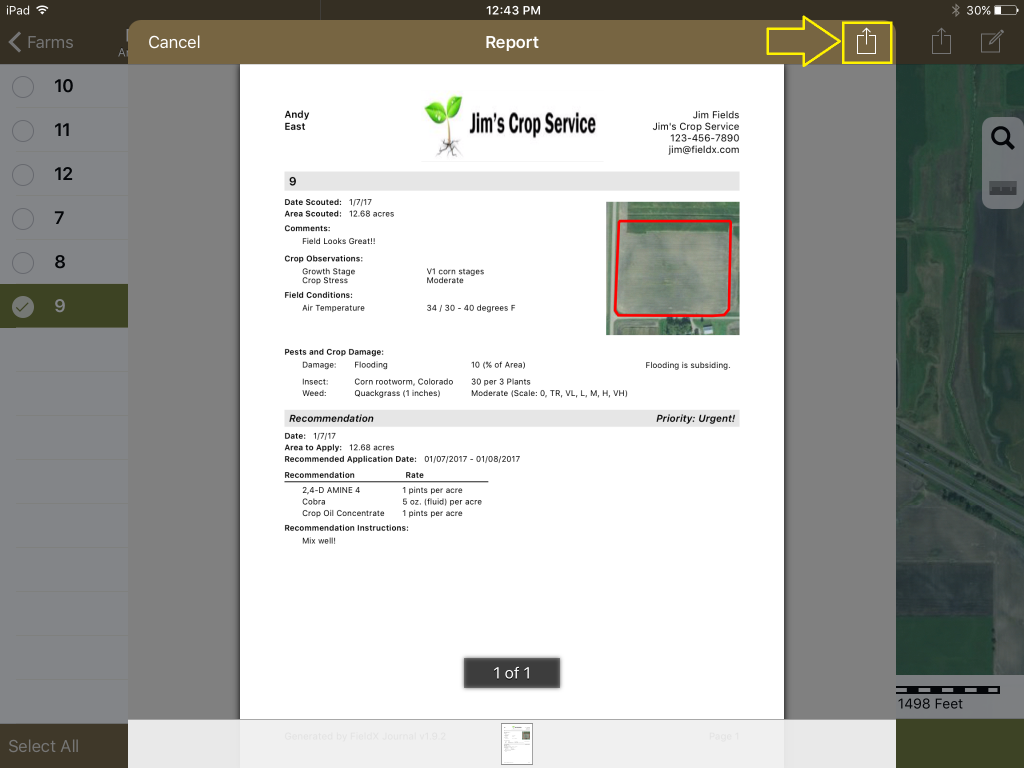
- Review the data included in the report.
Sharing the Report
-
- Tap the ‘Share’ icon in the top-right corner of the report viewer window to send your report.
- To email the report, select the ‘email’ option.
- Enter into the ‘To:’ section the email addresses of those you want the report sent to. Add a Cc/Bcc email address if needed and give the email a title/description in the ‘Subject:’ section. Your PDF reports will be attached.
- Tap ‘Send’ in the upper right corner of the New Message window to send the email.
- You may also send the reports as an attachment via the Messages app, or you can print it if a printer is connected to your iPad.
- Tap the ‘Share’ icon in the top-right corner of the report viewer window to send your report.


