Project Details:
When using FieldX, the Grower Tree organizes FieldX data, and is used to select items and determine actions within the Journal, Reports, Maps, Attributes, and the Field Overview tab.
The default structure for the grower tree has three tiers:
Growers, Farms, and Fields
Overview
When using FieldX, the Grower Tree organizes FieldX data, and is used to select items and determine actions within the Journal, Reports, Maps, Attributes, and the Field Overview tab.
The default structure for the grower tree has three tiers:
- Growers
- Farms
- Fields
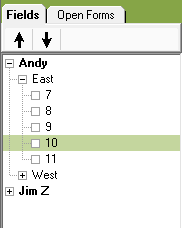
The grower tree is set up as a hierarchy.
- Growers are made up of a group of farms
- Farms are made up of a group of fields.
Clicking on the (+) box to the left of a name shows the levels underneath it. Clicking on the (-) box collapses the section and hides the items underneath it.
When working in the Grower Tree, note that the highlight bar over a line indicates that a Grower, Farm or Field is selected. Remember that multiple items in the Grower Tree can be selected.
Add Grower Tree Items from the Fields Tab
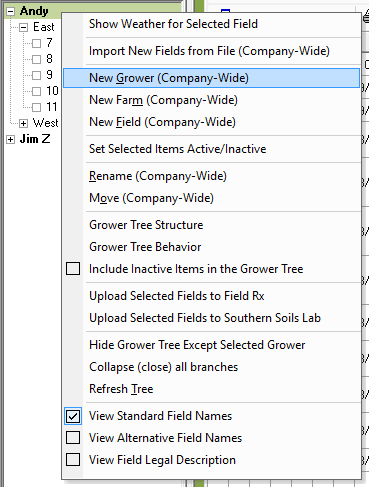
- Right-click on the section of the Grower Tree that you want to add an item.
- If the Grower Tree is empty, you can click on the white space within the Fields tab.
- Select ‘New Grower.’
- Select the Grower from the existing list of contacts.
- Or, click ‘Create New Grower’ and type in a new name.
- Select ‘New Farm’ and type in the name of the Farm.
- Select ‘New Field’ and type in the name of the Field.
- Repeat steps as needed.
After fields have been created, move on to edit the Attributes Tab to record the lasting characteristics for a Grower Tree item, then move to the Field Maps tab to add Field Borders


